 英语
 俄语

Content
- 1 Normal Discharge and Real Failure Look Different Once You Know the Rhythm
- 2 Identify the Assembly Type Before You Diagnose Anything
- 3 The Six Causes Behind Persistent Dripping
- 4 A Fifteen-Minute Diagnostic Sequence
- 5 Repair or Replace: Deciding With Actual Numbers
- 6 Connections, Hoses, and Clamps That Quietly Cause Repeat Dripping
- 7 Habits That Keep a Backflow Preventer Quiet
- 8 Frequently Asked Questions
- 8.1 How long should a reduced pressure zone relief valve drip before it is considered faulty?
- 8.2 My backflow preventer only drips when the water heater runs. Why?
- 8.3 Can I stop the dripping by simply cleaning the check valve?
- 8.4 Is a dripping backflow preventer a health risk?
- 8.5 How much water does a steady drip actually waste?
- 8.6 Why does the dripping come back a few weeks after a repair?
A 2-inch reduced pressure zone assembly starts dripping from its relief port about twenty minutes after the irrigation main is pressurized on a warm spring morning. Water pools on the concrete pad, the property manager photographs it, and the assumption is always the same: the valve has failed and needs to be replaced.
In a large share of those calls, the assembly is performing exactly as designed. The relief valve is discharging a small amount of water to keep the middle chamber at a lower pressure than the supply, which is the whole point of a reduced pressure zone device.
The short answer: intermittent dripping from a reduced pressure zone relief valve is normal; continuous dripping from that same port, or any visible dripping from a double check valve assembly, indicates a mechanical fault inside the device. The sections below separate those two situations, explain the six causes that produce persistent dripping, and give a diagnostic sequence you can finish in about fifteen minutes with a bucket, a pressure gauge, and a wrench.
Normal Discharge and Real Failure Look Different Once You Know the Rhythm
A reduced pressure zone assembly holds three pressure regions: supply pressure, the middle chamber, and the discharge outlet. The relief valve in the middle chamber is spring-loaded to open whenever that chamber comes within roughly 2 psi of the supply pressure. Any event that momentarily raises the middle chamber pressure pushes water out of the port. That event can be thermal expansion in a closed line, a spike in supply pressure when a nearby pump starts, or a slightly weeping check valve seat that lets supply water creep past.
What separates normal operation from a fault is duration and repetition. A healthy unit discharges for a few seconds during startup, after a pressure fluctuation, or once during a heating cycle. It then seals. A faulty unit keeps a thin, steady stream running for minutes or hours, or discharges every time the downstream side is used.
Double check valve assemblies behave differently. There is no relief port, so there is nothing that should ever discharge. Water appearing under a double check assembly comes from a body crack, a loose test cock, a threaded joint, or a failed gasket at the bottom of the housing. Pressure vacuum breakers sit in a third category: a brief spurt at shutoff is expected, but a steady drip from the vent means the float or the check seat is not sealing.
- Discharge that lasts under 60 seconds and stops cleanly is normal for a reduced pressure zone device.
- Discharge that restarts every time downstream water is used points to a leaking first check valve.
- Discharge that never stops, even with no downstream demand, points to a leaking second check valve or a fatigued relief valve spring.
- Any water under a double check valve assembly is abnormal and should be traced to a mechanical source.
Identify the Assembly Type Before You Diagnose Anything
Four assemblies account for nearly all residential and light commercial dripping complaints. Each one drips for its own reason, and applying reduced pressure zone logic to a double check valve will send you looking for a relief port that does not exist.
| Assembly Type | Has a Relief Port | Is Dripping Normal | First Thing to Check |
|---|---|---|---|
| Reduced pressure zone | Yes | Brief discharge only | First check seat and relief diaphragm |
| Double check valve | No | Never | Test cocks and housing threads |
| Pressure vacuum breaker | Yes, an air vent | Short spurt at shutoff | Float disc and check seat |
| Hose connection vacuum breaker | Yes, a vent | No | Rubber washer and inlet O-ring |
Hose connection units fail in a way that surprises people. The rubber washer inside the female swivel hardens after two or three seasons, and water escapes down the threads rather than through the body. Replacing a fifty-cent washer solves a problem that is often misdiagnosed as a cracked valve.
The Six Causes Behind Persistent Dripping
When the discharge does not stop, the cause is almost always one of the following. They are listed roughly in order of how often they show up during field inspection.
1. Debris trapped on the check valve seat
This is the single most common finding. Any water movement through the device can carry grit, pipe scale, thread sealant fragments, or sand into the valve body. Manufacturer service literature points out that even routine flushing to clear air from a system is enough to move debris into the valve. A grain of sand the size of a pinhead sitting on a rubber seat creates a permanent micro-channel that lets supply pressure bleed into the middle chamber, and the relief valve then discharges continuously. The tell is timing: the dripping usually starts right after a seasonal startup, a main repair, or a system flush.
2. Hardened or deformed check seals
Rubber seats in a typical assembly last somewhere between five and ten years in municipal water. Chlorine and chloramine accelerate the process, and hot water service shortens it further. Once the seat takes a permanent set, it no longer conforms to the seat ring. The result is a slow, steady weep that behaves identically to debris fouling but does not clear when the valve is rinsed. If the unit is more than eight years old and flushing does not help, the seals are the likely culprit.
3. Relief valve diaphragm or spring fatigue
The relief valve holds a specific spring preload that keeps it closed under normal pressure differentials. After years of cycling, the spring relaxes and the diaphragm stiffens. The valve then opens at a lower differential than intended and stays partly open, producing a constant trickle that ignores downstream demand entirely. This failure is easy to confirm: close the supply, then reopen it. If water begins escaping before the system has had time to build any downstream pressure, the relief valve itself is the problem rather than a check seat.
4. Thermal expansion inside a closed system
A backflow preventer creates a closed zone. Add a check valve downstream, a water heater, or a booster pump, and the trapped water has nowhere to expand. Water expands roughly 0.02 percent per degree Fahrenheit, which sounds trivial until you consider a 200-foot run of 1-inch pipe holding about 8 gallons. A 10-degree rise in that volume against a rigid boundary can push system pressure up by tens of psi, and the relief valve discharges to relieve it. If dripping correlates with the water heater cycling or with afternoon sun on exposed piping, thermal expansion is the cause, and a properly sized thermal expansion tank is the fix.
5. Freeze damage from the previous winter
Lead-free brass housings crack at the bonnet threads and along the relief port boss when water freezes inside. The crack is often a hairline that only weeps when the line is pressurized, so the device appears dry all winter and starts dripping on the first warm day of spring. Look for a chalky white mineral trail running down the body, which marks where water has been escaping and evaporating over months.
6. Installation, support, and drainage problems
A unit that is not mounted level, or that hangs unsupported on the piping, distorts the body slightly and loads the internal seats unevenly. A blocked or undersized drain can also create the illusion of a leak: discharge water accumulates under the housing, keeps the pad wet, and looks like a continuous drip when the device is actually operating correctly. Confirm that the drain discharges to an approved location with visible air gap clearance and that the assembly is level in both directions.
A Fifteen-Minute Diagnostic Sequence
Work through these steps in order. Stop as soon as one produces a clear answer, and note what you find, because the pattern usually identifies the fault before any part is removed.
- Record the drip rate with a measuring cup over one minute. Note the number; it becomes your baseline for judging whether a repair worked.
- Close the downstream shutoff valve so no water can flow into the building or the irrigation zone. If the dripping stops within a minute, a check valve is passing and the relief valve is simply responding.
- Close the upstream shutoff valve next. If dripping continues while both sides are isolated, the relief valve spring or diaphragm has lost its preload.
- Attach a pressure gauge to the number two test cock and watch it for two minutes with the supply open and downstream closed. A reading that climbs steadily indicates thermal expansion or a leaking first check.
- Shut off the supply, open a downstream faucet to relieve pressure, and disassemble the first check. Wipe the rubber seat and the seat ring with a clean cloth and inspect for embedded grit, cuts, or a permanent flat spot.
- Reassemble, restore flow, and repeat the one-minute measurement. If the drip rate has dropped to zero or to occasional short discharges, the problem was debris. If it is unchanged, the seals or the relief valve need replacement.
A related habit worth building is inspecting the sealing surfaces of every threaded connection at the same time. The techniques in this guide on preventing leakage in compression fittings apply directly to the test cock threads and union joints that surround a backflow assembly.
Repair or Replace: Deciding With Actual Numbers
Two repairs on the same assembly usually cost more than one replacement, and the break-even point arrives faster than most owners expect. The table below reflects typical North American parts pricing during 2026 for a 2-inch assembly and will vary by size, brand, and region.
| Situation | Repair Kit Cost | Full Replacement Cost | Recommended Action |
|---|---|---|---|
| Grit on the seat | 0 to 30 dollars | Not needed | Clean and reassemble |
| Worn check seals | 60 to 180 dollars | Not necessary | Rebuild the check modules |
| Relief valve fatigue | 70 to 200 dollars | Only if the body is corroded | Replace the relief module |
| Freeze crack in the body | Not applicable | 250 to 700 dollars | Replace the assembly |
| Fifteen years old with two prior repairs | 60 to 180 dollars | 250 to 700 dollars | Replace rather than rebuild |
The practical rule: if the assembly is under ten years old and the housing is sound, rebuild it; if it is over fifteen years old or has already been rebuilt twice, replace it. Labor dominates the bill either way, so the parts savings from a rebuild shrink quickly once a second visit is required.
Connections, Hoses, and Clamps That Quietly Cause Repeat Dripping
A backflow assembly rarely sits alone. On irrigation mains, wash-down stations, tanker filling points, and fire lines, it is bracketed by quick couplings, hose tails, and clamps. When those components are mismatched or worn, the resulting pressure instability reaches the assembly and triggers discharge that looks like a valve fault.
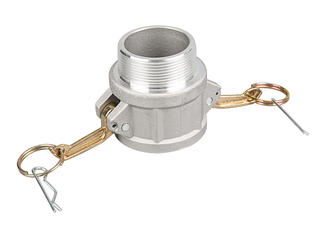
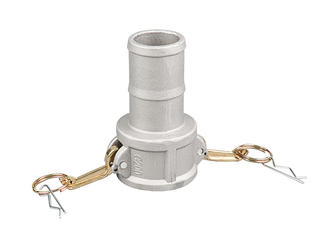
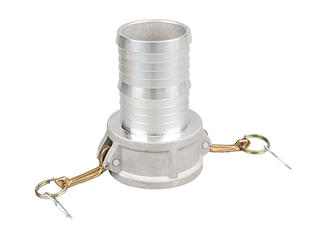
 Aluminum type C camlock couplingAdditional InformationView Product →
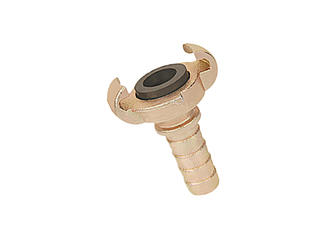
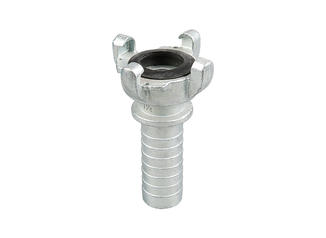
On the suction and discharge side of a pump or tanker, a hose-tail coupling with a properly machined barb holds the hose without deforming it. A barb that is too aggressive cuts the liner and creates a slow weep under pressure; a barb that is too smooth lets the hose creep off the tail and produces exactly the pressure oscillation that keeps a relief valve cycling every few minutes. Matching the coupling material to the medium matters too, since aluminium sheds weight while brass and stainless steel hold up better against aggressive water chemistry.
 Whipcheck Safety CableAdditional InformationView Product →
Where large-diameter hoses connect under pressure, a safety cable is not optional. A coupling that lets go at 100 psi turns a hose into a whip, and the resulting pressure shock travels straight back to the backflow assembly. Protecting the joint protects everything upstream of it.
 2 inch male storz couplingAdditional InformationView Product →
Fire and standpipe systems add another wrinkle. Storz connections let a hose be coupled in seconds, but a worn gasket or a bent lug leaks under pressure and creates the same downstream instability. Inspecting the gasket, the lug geometry, and the coupling key clearance takes under a minute and prevents a call-back that has nothing to do with the backflow device itself.
Habits That Keep a Backflow Preventer Quiet
Nothing on this list takes more than a few minutes, and together they eliminate most repeat dripping.
- Flush new mains and repaired lines before the assembly is put back in service, and flush through a bypass rather than through the valve body.
- Fit a strainer upstream on any line fed from a well, a pond, or an open reservoir.
- Install a thermal expansion tank wherever a check valve or a pressure-reducing valve creates a closed hot water zone.
- Drain and insulate the assembly before the first freeze, including the relief port and the test cocks.
- Keep the drain clear and confirm the air gap is visible after every season of growth around the pad.
- Cycle both test cocks twice a year so they do not seize and tear a seal the next time they are opened.
Frequently Asked Questions
How long should a reduced pressure zone relief valve drip before it is considered faulty?
Short discharges that stop within about a minute are normal. If the port produces water for more than a minute, or if it restarts within minutes without any downstream demand, treat it as a fault and work through the diagnostic sequence.
My backflow preventer only drips when the water heater runs. Why?
That pattern points to thermal expansion rather than a valve defect. The assembly and a downstream check valve create a closed zone, and heated water in that zone has nowhere to expand. An expansion tank sized to the system volume absorbs the growth and stops the discharge.
Can I stop the dripping by simply cleaning the check valve?
Often, yes. Debris on the seat is the most frequent cause, and wiping both the rubber seat and the seat ring with a clean, lint-free cloth resolves it. If the seal has taken a permanent flat spot or shows a cut, cleaning will not help and the seal must be replaced.
Is a dripping backflow preventer a health risk?
Water escaping from the relief port is discharge from the middle chamber, which is normally safe, but a discharge that never stops means a check valve is not sealing, which removes the protection the device exists to provide. Treat persistent dripping as a functional failure rather than a cosmetic one.
How much water does a steady drip actually waste?
A thin stream measuring about 0.2 gallons per minute adds up to roughly 288 gallons a day, which is close to 105,000 gallons a year. Even a slow drip at 0.05 gallons per minute wastes about 26,000 gallons annually, so the repair usually pays for itself in a single season on metered water.
Why does the dripping come back a few weeks after a repair?
Repeat failures almost always trace to an ongoing source of debris, ongoing thermal expansion in a closed zone, or a check valve seat ring that was not replaced alongside the rubber. Fixing the symptom without addressing the source guarantees the next call.
Dripping from a backflow preventer is a signal, not a verdict. Rhythm tells you whether the device is regulating pressure as designed or passing water through a compromised seat. Measure the drip rate, isolate each side of the assembly, and check the seat before ordering anything.
Most persistent dripping traces back to debris, aged rubber, or thermal expansion, and all three have straightforward fixes. The assemblies that stay quiet are the ones whose surrounding hoses, couplings, clamps, and drains are matched correctly and inspected on a schedule rather than after the pad is already wet.