英语
英语 俄语
俄语Content
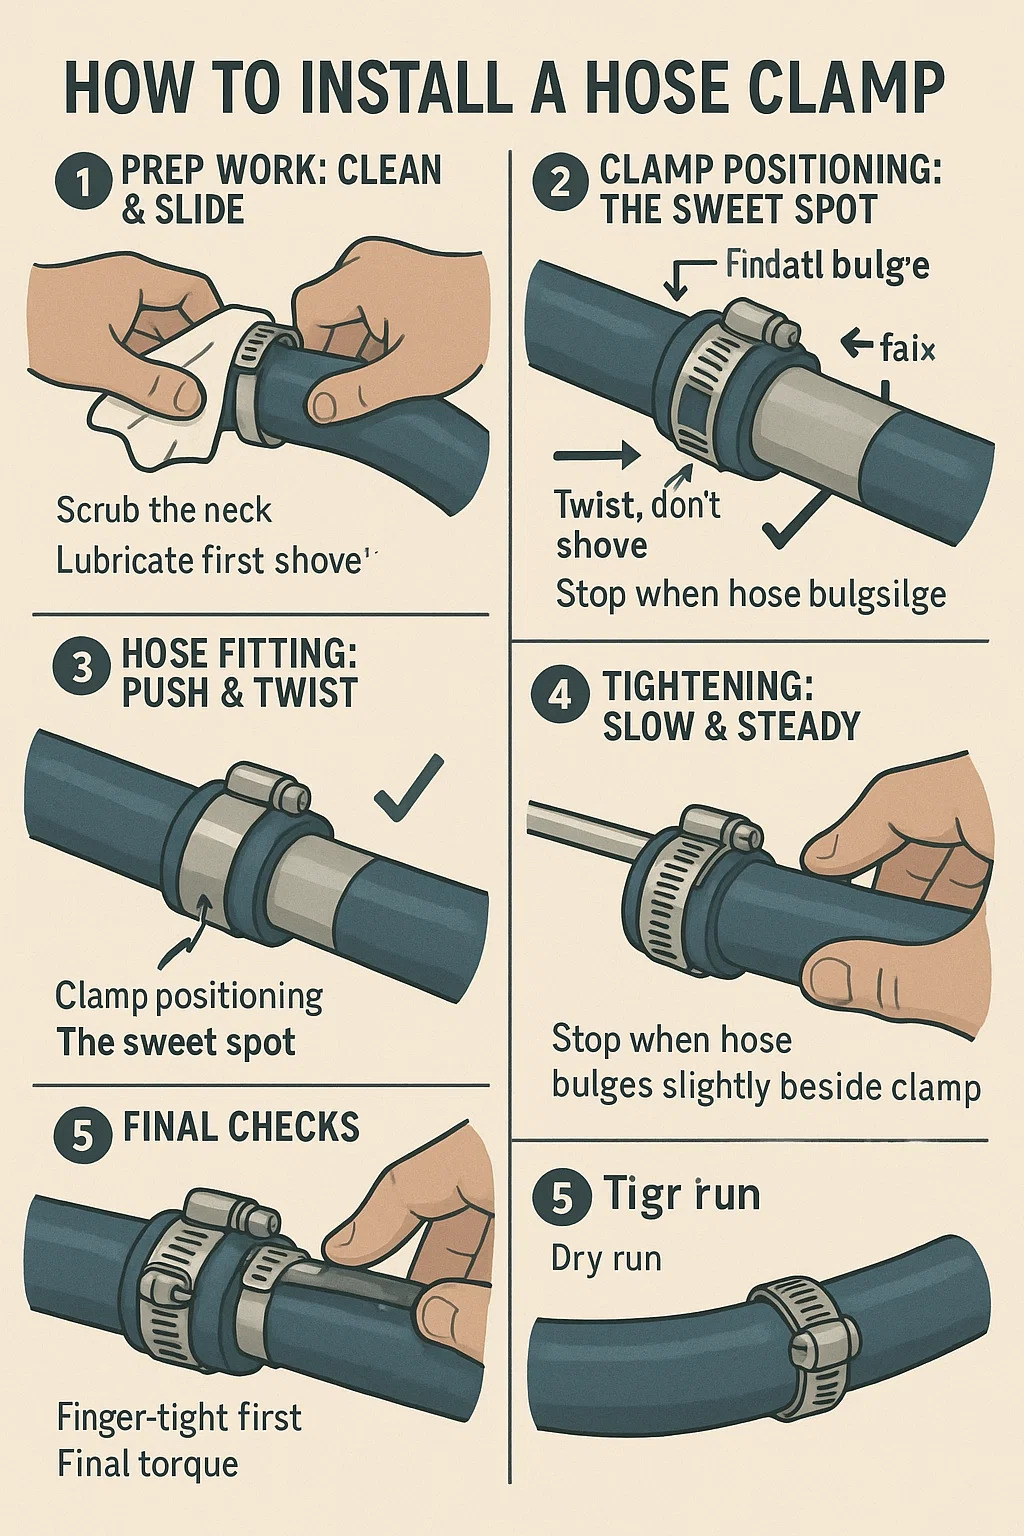
Here's how to install a hose clamp correctly:
1. Prep Work: Clean & Slide
Scrub the neck: Wipe the pipe fitting (where the hose attaches) with a rag. Dirt or old gasket scraps cause leaks.
Slide the clamp on FIRST: Always slip the clamp onto the hose before pushing the hose onto the fitting. Forgetting this means disassembling everything!
2. Hose Fitting: Push & Twist
Lubricate if stubborn: For tight hoses, dab soapy water or silicone spray on the pipe fitting. Never use oil – it rots rubber.
Twist, don't shove: Rotate the hose back and forth while pushing. You'll feel a solid "thunk" when it seats fully against the fitting's ridge.
3. Clamp Positioning: The Sweet Spot
Find the bulge: Look/feel for the raised shoulder on the fitting. Position the clamp so it covers this ridge completely.
Too far forward: Cuts hose.
Too far back: Hose slips off.
Align screws: Point the clamp's adjustment screw where you can reach it easily later.
4. Tightening: Slow & Steady
Finger-tight first: Turn the screw/driver until resistance starts.
Final torque:
Worm gear clamp: Tighten ¼ turn with a screwdriver.
T-bolt clamp: Snug nuts crosswise (like lug nuts) until gap closes.
Spring clamp: Use pliers to squeeze tabs until parallel.
Stop when: Hose bulges slightly beside the clamp. More = crushing!
5. Final Checks
Tug test: Gently pull the hose. No movement? Good.
Dry run: Run fluid without pressure (e.g., fill a coolant system). Check for drips.
Re-tighten if needed: Some hoses settle after heat cycles. Check clamps after first use.