英语
英语 俄语
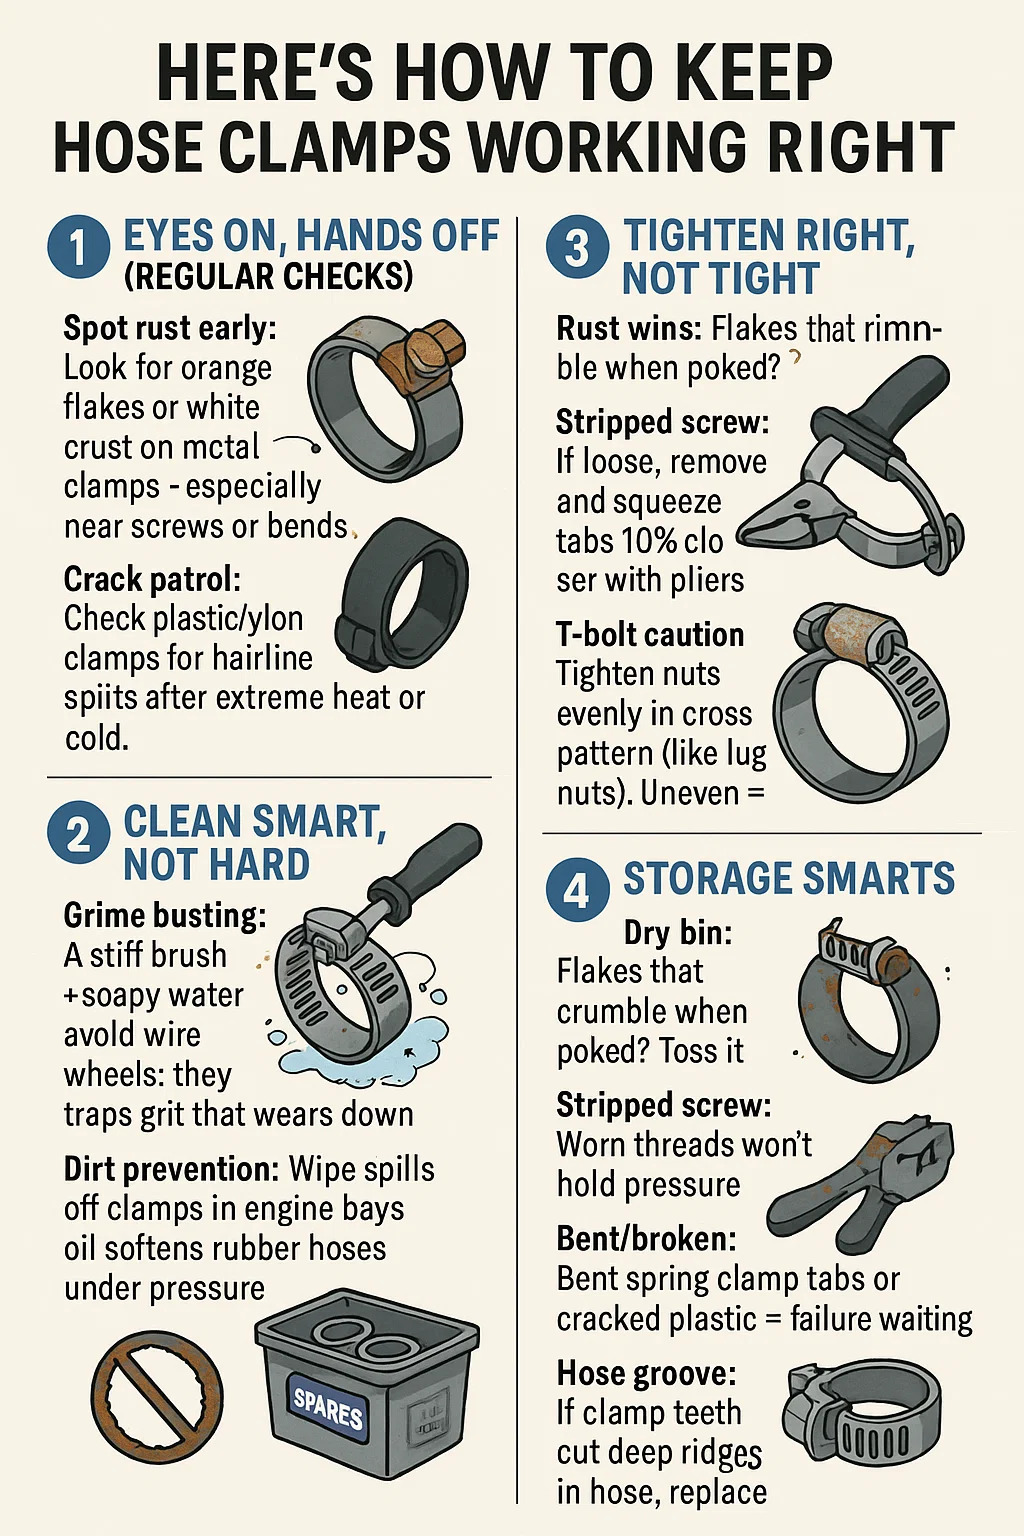
俄语Here's how to keep hose clamps working right:
Content
1. Eyes On, Hands Off (Regular Checks)
Spot rust early: Look for orange flakes or white crust on metal clamps – especially near screws or bends.
Crack patrol: Check plastic/nylon clamps for hairline splits after extreme heat or cold.
Tension tells: Spring clamps with a visible gap between ends? Tension's gone – replace it.
2. Clean Smart, Not Hard
Grime busting: Scrub grimy clamps with a stiff brush + soapy water. Avoid wire wheels – they eat protective coatings.
No oil/grease: Never lube worm gear threads – it traps grit that wears down teeth.
Dirt prevention: Wipe spills off clamps in engine bays – oil softens rubber hoses under pressure.
3. Tighten Right, Not Tight
Worm gear rule: Finger-tighten screw, then ¼ turn with screwdriver – stops leaks without crushing hoses.
Spring clamp reset: If loose, remove and squeeze tabs 10% closer with pliers – but don't over-bend!
T-bolt caution: Tighten nuts evenly in cross pattern (like lug nuts). Uneven = leaks.
4. Replace When
Rust wins: Flakes that crumble when poked? Toss it.
Stripped screw: Worn threads won't hold pressure.
Bent/broken: Bent spring clamp tabs or cracked plastic = failure waiting.
Hose groove: If clamp teeth cut deep ridges in the hose, replace both.
5. Storage Smarts
Dry bin: Keep spares in a sealed container with silica gel packs to fight rust.
Size sort: Label bins by clamp diameter – no fumbling during repairs.
No sunbaking: UV rays weaken plastic clamps – store indoors.