 英语
英语 俄语
俄语
Content
- 1 How to Replace a Cam Lock: A Direct Answer First
- 2 Types of Cam Locks You Might Be Replacing
- 3 Step-by-Step: How to Replace a Furniture or Panel Cam Lock
- 4 Step-by-Step: How to Replace an Industrial Camlock Coupling
- 5 Choosing the Right Replacement Camlock Coupling Material
- 6 Gasket Replacement: The Most Overlooked Part of the Job
- 7 Common Reasons Cam Locks and Camlock Couplings Need Replacement
- 8 How to Avoid Mismatched Camlock Coupling Replacements
- 9 Maintenance Tips to Extend the Life of Cam Locks and Camlock Couplings
- 10 Frequently Asked Questions
- 10.1 Can I replace just the cam arms on a camlock coupling instead of the entire fitting?
- 10.2 Are camlock couplings from different manufacturers interchangeable?
- 10.3 How do I know what size cam lock I need for a replacement?
- 10.4 Can camlock couplings be used for gas as well as liquids?
- 10.5 How long do camlock couplings typically last?
How to Replace a Cam Lock: A Direct Answer First
Replacing a cam lock — whether it's a furniture lock, a fluid transfer camlock coupling, or a panel-mount cam lock cylinder — follows the same core steps: identify the lock type and size, disconnect or depressurize the system if needed, remove the retaining nut or clip, pull out the old lock body, insert the replacement, and secure it. The entire process typically takes 5 to 20 minutes depending on whether you're working on a cabinet cam lock or an industrial camlock coupling used in hose and pipe assemblies.
This guide covers both scenarios in full detail — from simple furniture and panel cam locks to heavy-duty stainless steel and aluminum camlock couplings used in agriculture, petroleum, chemicals, and water transfer. Understanding which type you're dealing with is the first step to getting the replacement right.

Types of Cam Locks You Might Be Replacing
Before buying a replacement or picking up a wrench, you need to confirm which category of cam lock you're dealing with. The term "cam lock" covers two very different product families.
Furniture and Panel Cam Locks
These are the small cylindrical locking mechanisms found in filing cabinets, office furniture, electrical enclosures, vending machines, and equipment panels. They're typically 16mm, 19mm, or 22mm in diameter, operate with a quarter-turn key, and use a retaining nut on the back face to hold them in place. Replacement parts are widely available at hardware stores and online, and costs generally run between $3 and $25 per unit depending on the material (zinc alloy vs. solid brass) and keying requirements.
Industrial Camlock Couplings (Cam and Groove Fittings)
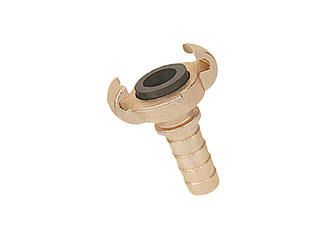
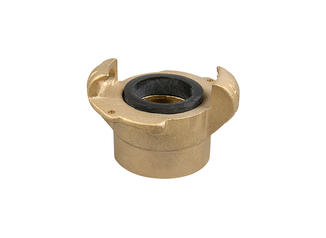
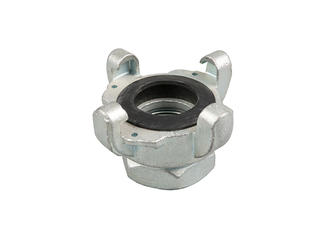
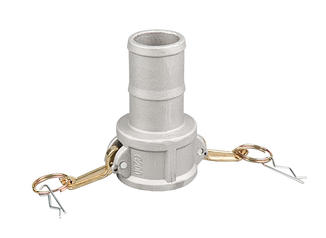
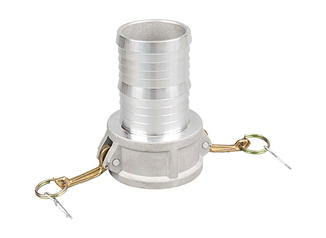
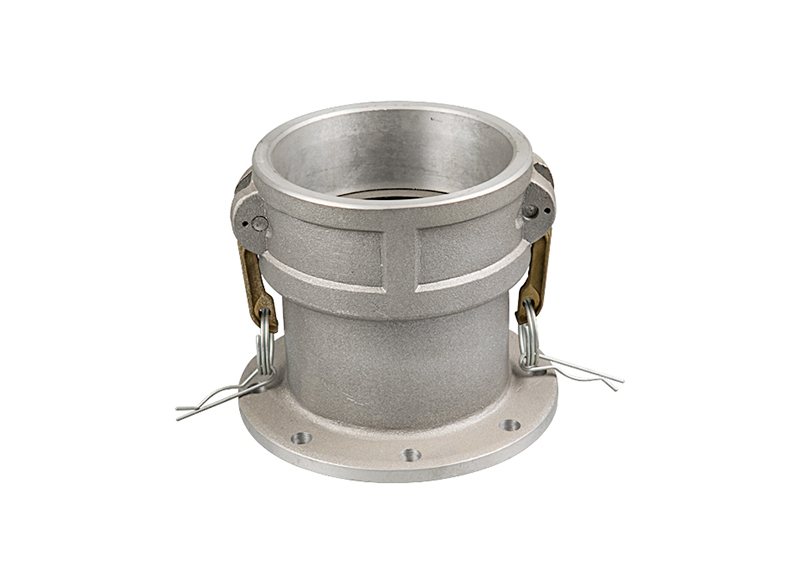
These are quick-connect fittings used in fluid and bulk material transfer systems. A camlock coupling — also called a cam and groove coupling — consists of a female coupler (Part C, D, DC) and a male adapter (Part A, B, E, F) that connect without tools by pressing the arms (cams) down to lock the groove of the adapter inside the coupler. They comply with MIL-C-27487 and EN 14420-7 standards and are available in sizes from ½ inch to 6 inches or larger.
When people refer to replacing a camlock coupling, they typically mean replacing a worn coupler or adapter that has cracked cam arms, a damaged groove, worn gaskets, or corroded body due to chemical exposure or mechanical stress.
| Feature | Furniture / Panel Cam Lock | Industrial Camlock Coupling |
|---|---|---|
| Application | Cabinets, panels, enclosures | Hose, pipe, fluid transfer |
| Common Materials | Zinc alloy, brass, chrome | Aluminum, stainless steel, brass, polypropylene |
| Tools Required | Flathead screwdriver or wrench | None (hand-operated) or pipe wrench |
| Replacement Time | 5–10 minutes | 2–15 minutes per fitting |
| Typical Cost | $3–$25 | $5–$120+ depending on size and material |
| Key Failure Mode | Broken key, worn cylinder | Cracked cam arms, worn gasket, corrosion |
Step-by-Step: How to Replace a Furniture or Panel Cam Lock
Panel cam locks are among the most common cam locks people need to replace. They fail because keys are lost or broken, the cylinder wears out from repeated use, or the lock is being rekeyed for security reasons. Here's the full process.
What You'll Need
- Replacement cam lock (match the diameter exactly: 16mm, 19mm, or 22mm are most common)
- Flathead screwdriver or cam lock removal tool
- Adjustable wrench or pliers (for the retaining nut)
- Masking tape (optional, to protect the panel surface)
- Calipers or a ruler to verify the hole cutout diameter
Removal Steps
- If the lock is functional and you have the key, insert it and rotate to the open position. This usually retracts the cam bar to its neutral position, making it easier to remove.
- Access the back side of the panel or cabinet door. You'll see a threaded retaining nut holding the lock body in place.
- Using pliers or a wrench, turn the retaining nut counterclockwise. On most 19mm locks, the nut is a standard hex nut; on some panel locks it's a flat ring nut that requires a spanner tool.
- Once the nut is removed, the cam bar (the metal piece behind the lock body) can be detached or will slide off.
- From the front side of the panel, push or pull the lock cylinder out through the hole.
Note: If the key is lost and the lock can't be turned, you may need to drill it out using a center punch and a 1/4-inch drill bit to destroy the pin stack before attempting extraction. Use a low-speed setting to avoid enlarging the hole.
Installation Steps
- Insert the new cam lock body through the panel hole from the front. Most locks have an anti-rotation lug or tab — align this with the corresponding notch in the panel hole or use the positioning tab to set the correct orientation.
- From the back, slide the cam bar onto the post of the lock body. Make sure it's oriented so the bar will engage the locking surface when rotated.
- Thread on the retaining nut by hand, then tighten with pliers or a wrench. Do not overtighten — most cam lock manufacturers specify a torque of around 2–3 Nm for zinc alloy nuts. Over-tightening can crack the nut or deform the body.
- Test the operation with the key. The cam bar should rotate smoothly between the locked and unlocked positions, and the door or drawer should engage cleanly.
Step-by-Step: How to Replace an Industrial Camlock Coupling
Industrial camlock couplings used in fluid transfer are built to be replaced quickly — that's part of their core design advantage. A damaged or leaking camlock coupling in a hose assembly running fuel, fertilizer, or chemicals needs to be swapped out immediately to prevent downtime and safety hazards. The process below applies to standard MIL-C-27487-compliant cam and groove fittings in sizes from ½" to 4".
Safety Before You Start
Never attempt to replace a camlock coupling while the system is pressurized. Even a low-pressure agricultural transfer line at 15–30 PSI can cause injury when a fitting is released unexpectedly. Before replacing:
- Shut down the pump or fluid source completely
- Bleed any residual pressure from the line by opening the lowest downstream valve
- Drain any trapped fluid using gravity or a collection pan below the fitting
- Wear appropriate PPE (gloves, safety glasses) especially for chemical or petroleum service
- Check material compatibility: replacing an aluminum camlock coupling on a line that carries acids or chlorides requires switching to stainless steel or polypropylene
Identifying the Camlock Coupling Type and Size
Camlock couplings follow a standardized part-type designation. Identifying what you have determines what you order as a replacement:
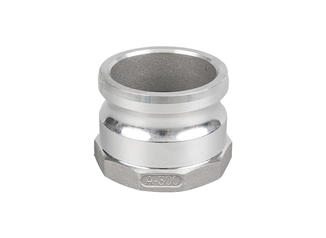
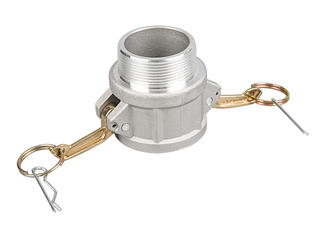
- Type A: Adapter with male NPT thread — connects a threaded male pipe end to a camlock coupler
- Type B: Adapter with female NPT thread — connects a threaded female pipe end to a coupler
- Type C: Coupler with female NPT thread — the receiving half with cam arms
- Type D: Coupler with male NPT thread
- Type E: Adapter with hose shank — attaches to hose via clamp or crimping
- Type F: Coupler with hose shank — the cam-arm coupler side for hose attachment
- Type DC: Dust cap for coupler; Type DP: Dust plug for adapter — used as end caps when the line is disconnected
Measure the nominal pipe or hose size in inches (½", ¾", 1", 1½", 2", 3", 4"). This determines the groove diameter of the adapter and the cam arm spread of the coupler. Mixing sizes — even within the same type — will result in a leak or failure to lock. A 2" Type E adapter will not properly mate with a 2" Type C coupler from a different manufacturer if the groove profile differs, so always source from a supplier with verified conformance to MIL-C-27487 or EN 14420-7.
Removing the Old Camlock Coupling
- Disconnect the coupling: Lift both cam arms (levers) on the coupler simultaneously and pull the adapter out. If the arms are stiff due to corrosion or buildup, apply a penetrating lubricant and allow 10–15 minutes of soak time before forcing them.
- Remove the gasket: The gasket (usually EPDM, Buna-N/NBR, Viton, or PTFE) sits in the groove inside the coupler. Use a small flathead screwdriver or pick to remove it. Always replace the gasket when replacing the coupling — reusing an old or compressed gasket is the most common cause of leaks after a coupling replacement.
- Unthread the body from the pipe or hose: For threaded couplers (Type C, D), use a pipe wrench on the hex flats of the body — not on the cam arm housing. For hose-shank types (Type E, F), cut the hose clamp, slide off the coupling, and inspect the hose end for damage before installing the new fitting.
- Clean the mating surface: Remove any PTFE tape, pipe dope, or corrosion from threads before installing the replacement. A wire brush and thread chaser work well here.
Installing the New Camlock Coupling
- Insert the new gasket into the coupler groove. Press it in evenly with your fingers to ensure it seats flat — a twisted or pinched gasket will leak under pressure.
- For threaded couplers: apply 2–3 wraps of PTFE tape to the male pipe threads (or thread sealant for high-pressure applications above 150 PSI). Thread the coupling on by hand until snug, then tighten with a pipe wrench to 1.5–2 turns past hand-tight for NPT threads. Avoid over-tightening, which can crack the coupling body, particularly on polypropylene or aluminum fittings.
- For hose-shank types: slide the new coupling shank into the hose at least to the full shank depth. Apply a new clamp — for hoses carrying petroleum or chemicals above 50 PSI, use a double-bolt clamp, not a worm-drive clamp. Tighten evenly.
- Connect the adapter to the new coupler. Align the adapter groove with the cam arms, push in firmly, and press both arms down simultaneously until they click or seat flat against the coupler body. Give the connection a firm pull-test by hand — it should not separate.
- Slowly restore pressure and check for leaks at all connection points. A soap solution or leak detector spray makes small leaks visible immediately.
Choosing the Right Replacement Camlock Coupling Material
Material selection is critical when replacing a camlock coupling. The wrong material choice can lead to accelerated corrosion, contamination of the fluid, or catastrophic failure. Here's how the four main materials compare:
| Material | Best For | Avoid With | Typical Pressure Rating |
|---|---|---|---|
| Aluminum | Water, diesel, petroleum, dry bulk | Acids, chlorine, seawater | Up to 150 PSI (2") |
| Stainless Steel (316) | Food, beverage, chemicals, marine | Strong oxidizing acids | Up to 250 PSI (2") |
| Brass | General water, LPG, compressed air | Ammonia, acetylene | Up to 200 PSI (2") |
| Polypropylene | Acids, fertilizers, mild chemicals | Aromatic solvents, high temps | Up to 75 PSI (2") |
Aluminum camlock couplings are the most commonly replaced type simply because they are the most widely used — roughly 60–70% of camlock coupling installations in agriculture and general industry use aluminum due to its light weight and low cost. However, if the original aluminum fitting failed due to pitting corrosion, swapping it for another aluminum unit without addressing the root cause (incompatible fluid, condensation, or galvanic contact with steel) will result in the same failure within months.
When upgrading during replacement, moving from aluminum to 316 stainless steel adds roughly 3–5x the material cost but significantly extends service life in humid, saline, or chemically aggressive environments. For food-grade applications, stainless steel with a polished internal bore is generally required under sanitary processing standards.
Gasket Replacement: The Most Overlooked Part of the Job
Whether you're replacing a furniture cam lock or an industrial camlock coupling, the sealing element — the gasket in fluid couplings or the O-ring in some panel locks — needs to be matched correctly to the application. Incorrect gasket material is the leading cause of leaks after a camlock coupling replacement, according to field reports from hose and fitting service centers.
Common Camlock Gasket Materials
- EPDM (ethylene propylene diene monomer): Best for water, steam, and mild chemicals. Not compatible with petroleum oils or fuels. Widely used in agriculture and water transfer.
- Buna-N / NBR (nitrile rubber): Excellent for petroleum, fuel, oil, and hydraulic fluids. One of the most common default gaskets shipped with camlock couplings. Avoid with ketones, ozone, and certain chlorinated solvents.
- Viton / FKM (fluoroelastomer): Highest chemical resistance across acids, fuels, and aggressive solvents. Temperature range up to 200°C. Significantly more expensive than NBR or EPDM — typically 5–10x the cost — but necessary for chemical service applications.
- PTFE (polytetrafluoroethylene): Used for ultra-high purity and aggressive acid service. Not recommended for applications with significant mechanical movement as it has poor elasticity and can cold-flow under compression.
- Silicone: Common in food, beverage, and pharmaceutical camlock coupling service. Good temperature range (−60°C to 200°C), FDA-compliant grades available. Not suitable for dynamic sealing in high-pressure applications.
For most replacement jobs, the gasket is included with a new camlock coupling. If you're only replacing the gasket (common for routine maintenance), order replacements by specifying the nominal size and material code. For example: "2-inch EPDM gasket for Type C camlock coupler."
Common Reasons Cam Locks and Camlock Couplings Need Replacement
Understanding why the original lock or coupling failed helps prevent repeating the same failure after replacement. Here are the most common causes:
For Furniture and Panel Cam Locks
- Lost or broken key: The most common reason. If the key breaks in the cylinder, the cylinder must usually be drilled out. A locksmith can sometimes extract a broken key without drilling if only a small portion has snapped.
- Worn cylinder wafers: High-use cam locks — such as those on vending machines or industrial enclosures opened dozens of times per day — wear out their internal wafer stacks over 3–5 years. The lock may start to open with virtually any key or simply stop turning.
- Security upgrade: Older cam locks without security features (anti-pick, anti-drill, anti-bump) are often replaced as part of facility security improvements.
- Rekeying an asset: When equipment changes hands or employees leave, cam locks may be replaced to issue new keys and revoke access to old ones.
For Industrial Camlock Couplings
- Cracked or bent cam arms: Cam arms are the most mechanically stressed component. Dropping a pressurized assembly, overtorquing, or using the wrong size can break one or both arms. A camlock coupling with a cracked arm is a safety hazard and must be replaced immediately — do not attempt to repair or weld cam arms.
- Worn groove on the adapter: The groove that the cam arms lock into can wear smooth after years of connecting and disconnecting. Once the groove depth falls below spec, the locking engagement is insufficient and the coupling can pull apart under pressure.
- Gasket degradation: Even without replacing the coupling body, a hardened, cracked, or swollen gasket will cause leaks. In seasonal outdoor use (irrigation, agriculture), gaskets should be inspected every year and replaced on a 2–3 year schedule regardless of visible condition.
- Corrosion or chemical attack: Aluminum couplings exposed to incompatible fluids will show pitting, white powder deposits, or stress cracking. Stainless steel couplings can suffer from crevice corrosion in chloride-rich environments. If corrosion is found, replace the entire coupling and reassess material selection.
- Threaded end damage: If the NPT threads on the coupling body are cross-threaded or stripped, the fitting cannot seal properly to the pipe. Thread repair inserts can sometimes save a pipe fitting, but a stripped camlock coupling body should be replaced rather than repaired.
How to Avoid Mismatched Camlock Coupling Replacements
One of the most frustrating mistakes in replacing a camlock coupling is ordering the wrong part. While camlock couplings are standardized, there are enough variations in thread type, size, material, and part type to create significant confusion. Here's a simple checklist to get the right replacement every time.
- Measure the nominal bore size with a caliper, not just by estimating. A 1½" and 2" camlock coupling look very similar at a glance but are completely incompatible.
- Identify the part type letter (A through F, DC, DP). Look at which end has the cam arms (that's the coupler/female half) and which has the groove (the adapter/male half).
- Check the thread standard: NPT (National Pipe Taper) is standard in North America; BSP (British Standard Pipe) is common in Europe, Australia, and Asia. NPT and BSP threads are not interchangeable.
- Verify the material code matches the fluid being transferred. When in doubt, cross-reference with a chemical compatibility chart specific to the fluid and elastomer pairing.
- Check operating pressure and temperature: A 2" polypropylene camlock coupling rated to 75 PSI should not be used to replace a 2" aluminum coupling in a system running at 100 PSI.
- If possible, bring the old coupling to the supplier or send photos with a ruler for reference. Reputable camlock coupling suppliers can often identify the exact replacement needed from photos alone.
Maintenance Tips to Extend the Life of Cam Locks and Camlock Couplings
Replacing a cam lock or camlock coupling is straightforward, but proactive maintenance can dramatically extend service life and reduce the frequency of replacements.
For Furniture and Panel Cam Locks
- Apply a small amount of graphite powder or PTFE-based dry lubricant to the key slot every 12–18 months. Avoid oil-based lubricants, which attract dust and gum up the wafer stack over time.
- Never force a key that doesn't turn smoothly. Forcing can snap the key or damage the cam bar, turning a simple cylinder replacement into a panel repair job.
- Keep a spare key in a secure, documented location. Most cam lock failures requiring replacement happen because all copies of the key are lost.
For Industrial Camlock Couplings
- Inspect cam arms visually before each use, especially on aluminum couplings. Look for cracks at the pivot point and signs of bending. A cracked arm cannot be trusted at operating pressure — replace immediately.
- Always install dust caps and plugs when couplings are disconnected. This keeps debris out of the coupler interior and protects the gasket from UV degradation and ozone cracking during storage.
- For seasonal equipment (irrigation systems, tank wagon hoses), flush and dry camlock coupling assemblies before storage. Trapped water inside aluminum fittings causes corrosion pitting during winter months.
- Lightly coat cam arm pivot pins with grease or anti-seize compound annually. Seized cam arms are a common issue on outdoor installations and can require significant force — or destruction of the fitting — to operate.
- Keep a small inventory of spare gaskets in the correct material for each application. A gasket replacement takes under 2 minutes and costs less than $2, while a missed gasket inspection leading to a coupling failure during fluid transfer can cause thousands of dollars in product loss, cleanup, and downtime.
- When connecting a camlock coupling, press both arms down fully and give the connection a firm manual pull test before applying pressure. A partially locked coupling may hold at low pressure but fail suddenly when the system pressurizes.
Frequently Asked Questions
Can I replace just the cam arms on a camlock coupling instead of the entire fitting?
On some heavy-duty camlock couplings — particularly stainless steel and large-diameter industrial grades — the cam arms are replaceable separately using the pivot pin. However, on most standard aluminum and polypropylene camlock couplings, the arms are integrated with the body and the entire coupler must be replaced. Attempting to weld or repair a cracked cam arm is not recommended, as the repair cannot be pressure-tested to the original specification.
Are camlock couplings from different manufacturers interchangeable?
In theory, yes — camlock couplings conforming to MIL-C-27487 or EN 14420-7 are dimensionally interchangeable. In practice, manufacturing tolerances vary, and mixing brands can sometimes result in looser engagement or early gasket wear. For critical applications (chemical, petroleum, high-pressure), it's best to use fittings from the same manufacturer or to physically test-fit before deployment.
How do I know what size cam lock I need for a replacement?
For panel cam locks, measure the diameter of the mounting hole with calipers. Common sizes are 16mm (5/8"), 19mm (3/4"), and 22mm (7/8"). Also measure the panel thickness — most cam locks are designed for panels between 1mm and 12mm thick. For camlock couplings, measure the internal bore of the hose or pipe in inches. The nominal coupling size should match the nominal pipe or hose size.
Can camlock couplings be used for gas as well as liquids?
Camlock couplings are primarily designed for liquid transfer. Some are rated for compressed air and LPG (propane/butane) service, but this depends on both the body material and the gasket. Never use a camlock coupling on gas service unless it is explicitly rated and certified for that application. The risk of a sudden disconnection under gas pressure is far more dangerous than the same event on a liquid transfer line.
How long do camlock couplings typically last?
With proper maintenance, stainless steel camlock couplings can last 10–20 years or more in appropriate service conditions. Aluminum couplings in agricultural water service typically last 5–10 years. Polypropylene fittings in chemical service may need replacement every 3–5 years depending on UV exposure and chemical concentration. Gaskets should be replaced every 2–3 years regardless of the coupling body condition.